
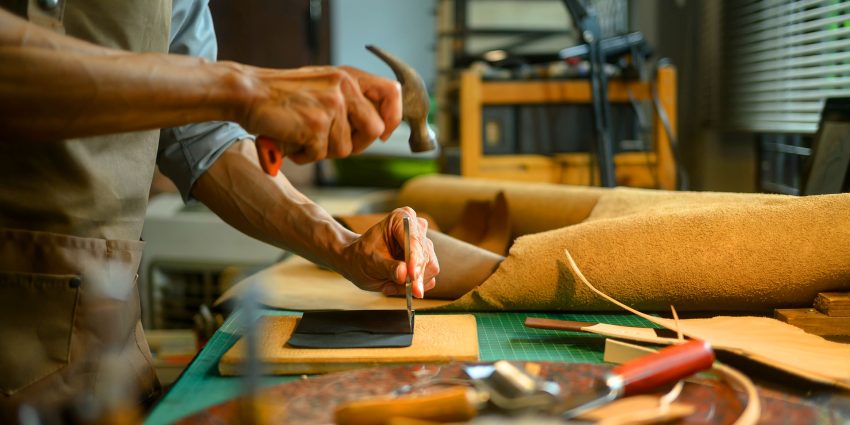
Ever stared at a workbench full of hides, tools, and half-finished projects wondering why your leather pieces still look rough around the edges? You’re not alone. Most leatherworking frustrations trace back to one root cause: the wrong leather work equipment or a setup that’s missing key pieces entirely.
Whether you’re stitching your first wallet or running a full leather shop, having the right gear changes everything. It’s the difference between fighting your materials and working with them.
What equipment do you need for leatherworking?
Answer: Basic leatherworking requires a cutting tool (rotary cutter or knife), cutting mat, edge beveler, stitching groover, pricking irons or awl, needles and thread, mallet, and a burnishing tool. Advanced setups add skiving tools, presses, and edge dye applicators for professional finishing.
Why the Right Equipment Actually Matters
Leather doesn’t forgive sloppy tools. A dull blade drags instead of slicing. A cheap awl bends under pressure. These small failures snowball into crooked stitches, uneven edges, and wasted material.
Good equipment isn’t about having the most gadgets. It’s about having tools that respond predictably every single time you pick them up.
Signs Your Current Setup Is Holding You Back
- Edges that look chewed rather than beveled
- Stitch holes that wander off your marked line
- Hand fatigue after short work sessions
- Inconsistent thickness when skiving leather
- Burnished edges that dull or crack quickly
If any of these sound familiar, the issue usually isn’t your skill level. It’s your toolkit.
Core Categories of Leather Work Equipment
Rather than buying randomly, it helps to think in categories. Every leather project touches these five stages, and each stage demands specific tools.
1. Cutting and Measuring Tools
Precision starts before the first stitch. You’ll want a sharp rotary cutter or head knife, a steel ruler, a cutting mat, and dividers for consistent measurements across pattern pieces.
2. Marking and Layout Tools
Awls, scratch tools, and stitching chisels help you transfer patterns onto leather accurately. Skipping this step leads to crooked seams later.
3. Stitching and Hand-Sewing Gear
This includes needles, waxed thread, pricking irons, and a stitching pony or clamp to hold your work steady. Stability here directly affects how clean your final seams look.
4. Edge Finishing Tools
Edge bevelers, burnishers, and slickers transform raw cut edges into smooth, polished finishes. This step is often what separates amateur work from professional-grade pieces.
5. Shaping and Pressing Tools
Mallets, presses, and molds help form leather into structured shapes like wallets, holsters, or bags. Without proper pressing tools, leather can lose its intended form over time.
Building a Setup That Grows With You
You don’t need every tool on day one. Start with essentials that cover cutting, stitching, and finishing, then expand as your projects get more ambitious.
For a deeper breakdown of exactly which items belong in a beginner-to-intermediate toolkit, it’s worth exploring the essential tools for leather making that experienced craftsmen consistently rely on. It’s a practical starting point before investing in specialty gear.
Signs of Quality Equipment
- Material: High-carbon steel blades hold an edge longer
- Grip comfort: Ergonomic handles reduce hand strain
- Precision manufacturing: Evenly spaced pricking irons prevent crooked stitching
- Durability: Solid construction withstands repeated mallet strikes
Maintaining Your Leather Tools
Equipment longevity depends heavily on maintenance. Sharpened blades cut cleaner, oiled tools resist rust, and properly stored awls stay straight.
- Wipe down metal tools after each session
- Store edge tools separately to avoid dulling
- Apply light oil to prevent corrosion
- Sharpen blades regularly rather than waiting until they’re unusable
A well-maintained toolkit performs consistently, which means fewer surprises mid-project.
Common Mistakes When Choosing Leather Work Equipment
Many beginners make avoidable errors that slow their progress. Watch out for these common pitfalls:
- Buying an entire kit before understanding which tools you’ll actually use
- Choosing dull or low-grade blades to save money upfront
- Skipping edge finishing tools, assuming they’re optional
- Ignoring proper tool storage, leading to rust and damage
Avoiding these mistakes early saves both time and material waste later.
Final Thoughts
Leatherworking rewards patience, but it also rewards preparation. The right leather work equipment doesn’t just make projects easier, it makes them possible in the first place. Focus on quality basics first, understand what each tool actually does, and expand your collection as your skills and projects demand more.
With a thoughtfully built toolkit and consistent maintenance habits, you’ll notice cleaner cuts, tighter stitches, and edges that actually hold up over time.
Frequently Asked Questions
What’s the most important tool for a beginner leatherworker?
A sharp cutting tool paired with a reliable edge beveler makes the biggest visible difference in early projects.
Can I use regular sewing needles for leather?
No. Leather requires specialized needles designed to pass through thick, dense material without bending or breaking.
How often should I sharpen my leather cutting tools?
It depends on usage, but inspecting blades before each project and sharpening at the first sign of dragging keeps cuts clean.
Do I need a stitching pony to start leatherworking?
It’s not mandatory, but it significantly improves stitch consistency by freeing both hands during sewing.
What causes uneven burnished edges?
Inconsistent pressure, low-quality burnishing tools, or skipping proper edge beveling before burnishing are common causes.